How To Sew Darts
We’ve recently released an extended sizing of our popular Amberley Dress pattern. As a part of creating this pattern we’ve added a bust dart for the larger sizes. So this seemed like a good opportunity to provide a tutorial all about darts!
First of all, what is a dart and why do we need them at all?
A dart is simply a fold sewn into a garment in order to create shape in an otherwise flat piece of fabric. It essentially makes the fabric shape more “3D”. A common form of dart are bust darts, and it’s these darts that you’ll find in the Amberley Dress extended size pattern, providing more room over the bust.
Darts are not especially challenging to sew, but there are a few initial steps you’ll need to go through in order to transfer the dart shape from the pattern onto your fabric. There are lots of methods of doing this - I’m going to show you a couple of them. Firstly a method using a pin and then the “proper” Tailor’s Tack method.
If you’d rather watch a video than read a blog post, you’re in luck! Just click the link below and you can watch the whole process on YouTube. Otherwise, just scroll past the video and read on…
Marking Darts - Pin Method

Here we can see the front bodice cut out, with the paper pattern still pinned to it. As the dart markings can be a little confusing, with a lot of overlapping lines for the different sizes, it’s a good idea to mark the dart lines for your particular size on the pattern with a coloured pen as a first step.

Now just pop a pin through the pattern and the fabric at the bust point of the dart. Make sure the pin passes through all the layers of fabric. In the case of the Amberley Dress, the bodice is cut on the fold, so there are 2 layers of fabric for the pin to pass through.

Mark the other ends of the dart by making small snips in the fabric, as you would for marking notches. Again, make sure you have snips on all layers of the fabric.
Now push the bust point pin right into the paper and fabric, up to the pin head.

Carefully remove the pattern. It will make a slight hole in the pattern as you remove it, but if you are careful it should only be small.
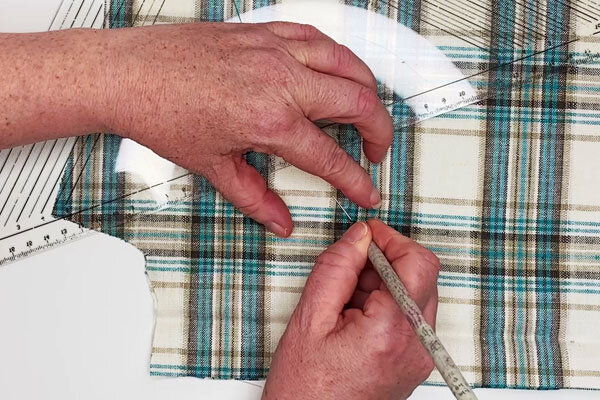
Mark the point where the pin passes through the fabric with a pencil (or chalk if you are using a darker fabric).

Using a ruler or set square, draw the lines from the bust point to the snips you made previously.

You will then have transferred the dart shape from the pattern to the fabric.
Now flip the fabric over and mark the pin position with a pencil, indicating the bust point for the other side of the bodice. You can then remove the pin and mark the dart shape on the other side of the bodice as before, using the pencil mark as a guide.
Marking Darts - Tailor’s Tack Method
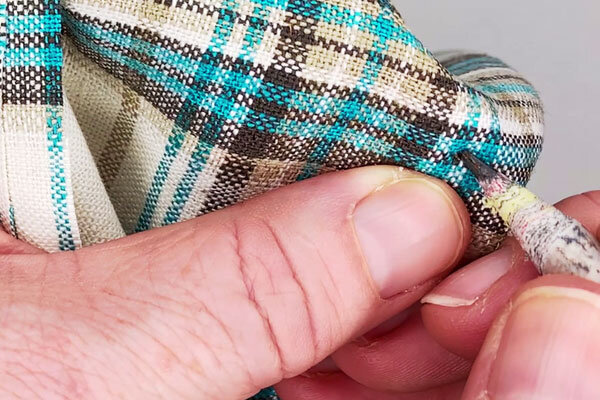
Well, that’s one way of doing it. And to be honest, that’s how I usually do it. But among the ways I was taught at college was to use a Tailor’s Tack. For this method you cut snips at the ends of the dart just like the pin method, but the way you mark the bust point is different.

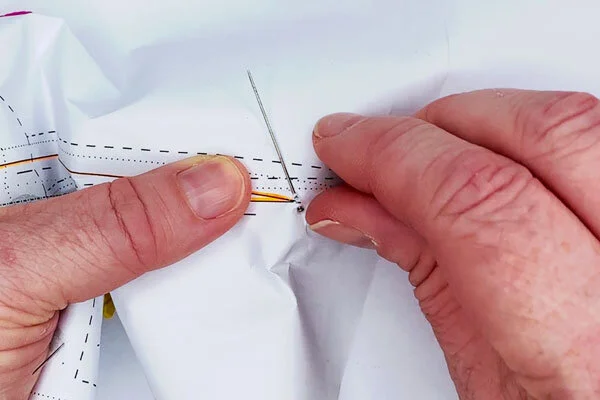
Instead of placing a pin at the bust point, sew a thread through it, making sure the thread passes through all the layers of fabric.

Then loop around and thread through a second time.
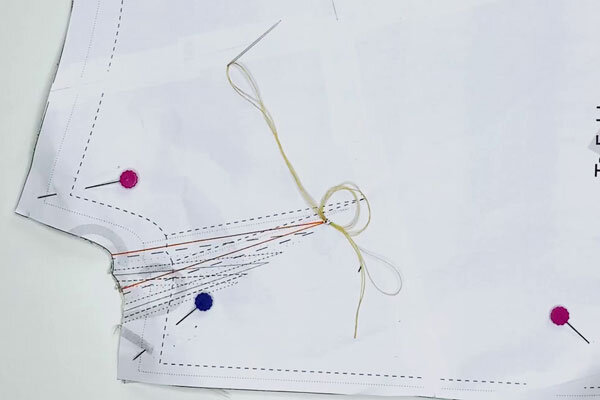
You should end up with a loop that looks like this.

Cut the thread from the needle.

And then gently pull away the pattern paper.
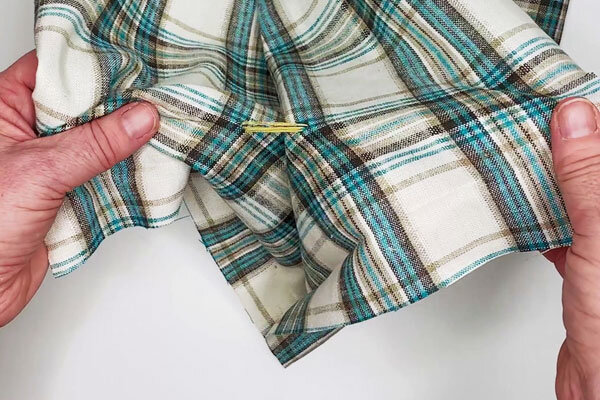
Slowly pull the bodice sides apart, revealing the thread between them.

And cut the thread to separate the two halves of the bodice.

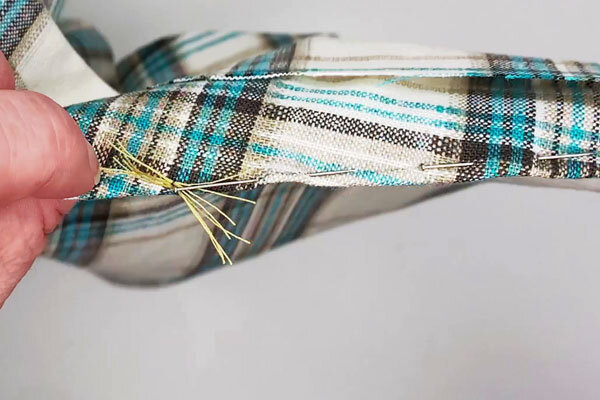
Ta da! You’ll then have two furry little strands of thread marking each bust point. You then simply repeat the pencil line drawing process as before but this time using the thread tufts as your bust point.
Preparing a Dart for Stitching

Whichever method you used up until this point, you’ll now need to prepare the dart of stitching. Fold the dart in half along its length by matching up the snips you made at the ends of the dart.

Secure the snipped end of the dart using a pin, aligning it with the pencil markings such that the length of the pin follows the pencil lines.

Place a pin at the other end of the dart (the bust point), perpendicular to the dart line. This is to mark the point at which your stitching will stop.

Then continue to place pins along the pencil lines, as you did with the first pin, until the dart is secured along its length with a neat line of pins.
It will look something like this (notice the little thread tufts if you used the Tailor’s Tack method).

Now it’s time to stitch. We’re going to stitch all the way along the pencil line, removing pins as we go.

Always stitch from the wide end of the dart. Back tack at the start and then continue to stitch along the pencil line down to the bust point. Do not back-tack at the bust point as this can cause puckers, just come straight off at the end.

Finally, press the dart downwards (for a bust dart), and you’re done. Here’s what the dart should look like on the wrong side of the fabric.

And here’s the finished dart on the right side.
So that’s it! Your darts are complete.
If you found this tutorial helpful, we’d love it if you shared it.

Sussex Seamstress is an independent pattern maker, based in Sussex, UK.
While you’re here, why not take a look at my range of sewing patterns for women?